This post will show a quick and complete example on how to authenticate someone using their Google credentials in your Ember.js web application. This uses the implicit-grant scheme in Oauth2, so everything happens on the client side, without exposing the user's Google credentials or requiring a back-end server. Obviously, at some point you'll have a server to store the authentication token and persist other user information, but the whole authentication infrastructure will stay on the client.
1 What we're building
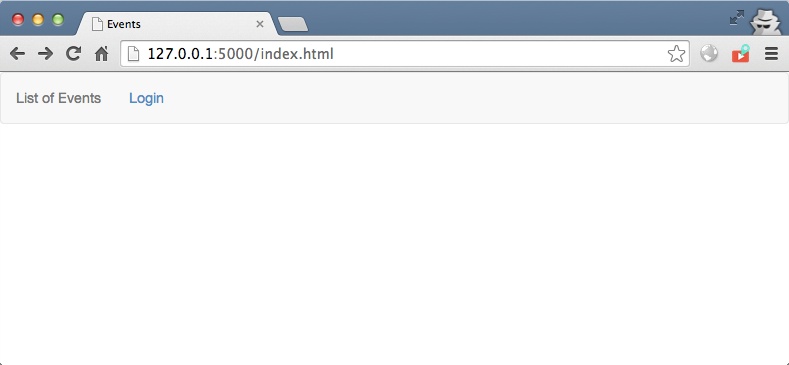
I'm going to use a toy example that displays a list of events to an authenticated user. When you first go to the app, it will show you nothing:
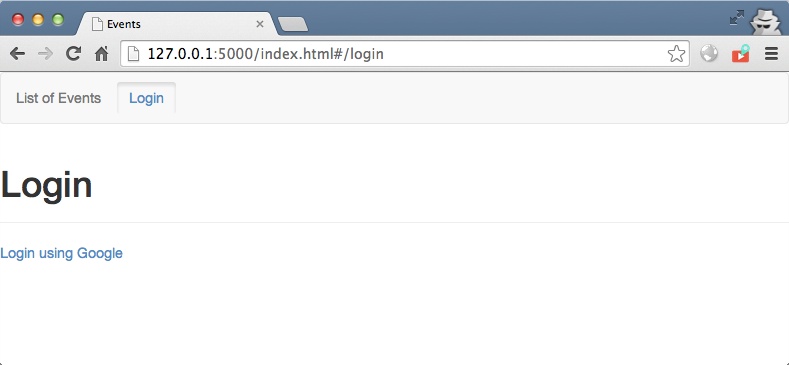
Any attempt to access it without being authenticated will redirect to the login page, which will pop-up a window to enter your Google credentials.
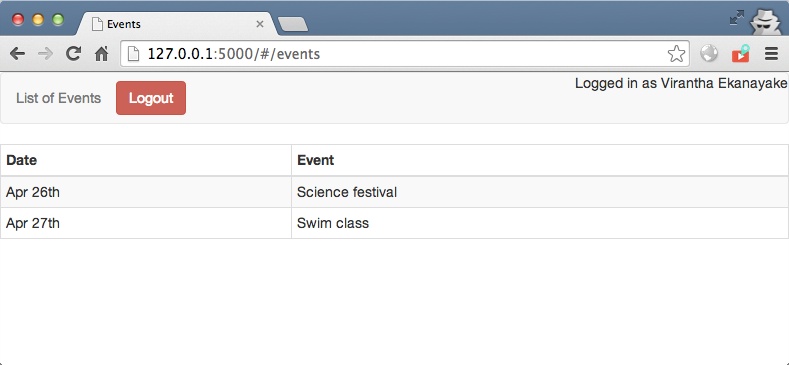
Once the credentials are entered succesfully, the app will automatically redirect to your events list.
2 Getting the code and running it
2.1 Pre-requisites
This method relies on a couple of great third-party extensions for Ember, which do all the heavy lifting in my example.
- Ember Simple Auth - This really flexible and simple library provides the basic framework for authentication and restricting certain routes to authenticated users.
- Ember Oauth2 - A simple but cool library to handle the communication with Oauth2 services like Google or Facebook.
2.2 Source code
You can find the source on github. Just git clone this repository, and start a simple web server in that directory and you should be good to go. For example, if you're on a Mac, you can just do:
git clone https://github.com/virantha/ember-oauth-example.git
cd ember-oauth-example
python -m SimpleHttpServer 5000
and then go visit http://127.0.0.1:5000/ in your browser. Remember, when dealing with Oauth, for local testing, always use 127.0.0.1 instead of localhost, because a lot of the service providers don't like providing authentication tokens to localhost.
3 Code discussion
3.1 Ember index.html
The html is pretty trivial, but here's a quick walk through:
<!DOCTYPE html>
<html>
<head>
  <meta charset="utf-8">
  <title>Events</title>
      <link href="//netdna.bootstrapcdn.com/bootstrap/3.0.0/css/bootstrap.min.css" rel="stylesheet">
</head>
<body>

<script type="text/x-handlebars">
<nav class="navbar navbar-default" role="navigation">
    <div class="container-fluid">
            <ul class="nav navbar-nav">
                <li> {{#link-to 'events'}}List of Events{{/link-to}}</li>
            </ul>
                    {{#if session.isAuthenticated}}
                        <a {{ action 'invalidateSession' }} class="btn btn-danger navbar-btn navbar-left" >Logout</a>
                        <p class='navbar-right'>Logged in as {{session.userFn}} {{session.userLn}} </p
                    {{else}}
                        {{#link-to 'login' class="btn navbar-btn navbar-left" }}Login{{/link-to}}
                    {{/if}}
    </div>
</nav>
    {{outlet}}
</script>
The first script is our main application outlet for Ember. Obviously, it's a handlebars template, and it defines a quick Bootstrap navigation bar that has a link to our Events page. After that, it has a conditional statement that checks if the session is authenticated. If it is, it displays the logout button as well as some user information retrieved from Google after a successful authentication. Otherwise, it just links to our Login route.
Here's the next template that handles the listing of the Events:
<script type="text/x-handlebars" data-template-name="events">
<div>
    <table class="table table-striped table-bordered table-condensed">
        <thead>
            <tr>
                <th>Date</th>
                <th>Event</th>
            </tr>
        </thead>
        <tbody>
        {{#each model}}
            <tr>
                <td> {{date}} </td>
                <td> {{title}} </td>
            </tr>
        {{/each}}
        </tbody>
    </table>
</div>
</script>
In this events template, we just display a table and for each row, we iterate through an array of events returned by the EventsModel in our Ember app, and display the date and title per event. Nothing in this template has any reference to authentication; all the protecting is done in the app itself as we'll see shortly.
Finally, we need a Login template as shown below:
<script type="text/x-handlebars" data-template-name="login">
      <div class="page-header">
      <h1>Login</h1>
      </div>
    <div>
      <a href="#" {{action "authenticate"}}>Login using Google</a>
    </div>

      {{#if errorMessage}}
        <div class="alert alert-danger">
          <p>
                <strong>Login failed:</strong>
                <code>{{errorMessage}}</code>
          </p>
        </div>
      {{/if}}
</script>
This just shows link with an authenticate action that will be triggered in our Authenticator in our app. In addition, it has an additional rendering part to display any authentication errors (e.g. if the user decided not to authorize access to their information. )
Finally, we have all the javascript includes. I've gone ahead and bundled the dependencies in the example code, but usually this would be more modular and perhaps pointing to a CDN:
<script src="jquery.js"></script>
<script src="handlebars.js"></script>
<script src="ember.js"></script>
<script src="ember-simple-auth.js"></script>
<script src="ember-oauth2.js"></script>
<script src="//netdna.bootstrapcdn.com/bootstrap/3.0.0/js/bootstrap.min.js"></script>
<script src="app.js"></script>
</body>
</html>
3.2 Ember app.js
Now, let's discuss the second part of our app, the main javascript code that implements the Ember App, located in app.js.
3.2.1 Initialize
Here, we initialize our authentication plugins as well as the authorizer. This is taken straight from the Ember-Simple-Auth guides:
 (function() {
     Ember.Application.initializer({
         name: 'authentication',
         initialize: function(container, application) {
             container.register('authenticator:custom', App.GoogleAuthenticator);
             container.register('authorizer:custom', App.CustomAuthorizer);
             Ember.SimpleAuth.setup(container, application, {
                 authorizerFactory: 'authorizer:custom',
             });
         }
     });

...

 }) ();
Next, let's turn on some debugging so we can see what happens inside Ember as we transition from route to route:
App = Ember.Application.create({
    LOG_TRANSITIONS:true ,
    LOG_TRANSITIONS_INTERNAL:true ,
    LOG_ACTIVE_GENERATION: true,
});
3.2.2 Define routes
Now, here's the usual Ember code that defines our routes. We only have two in this app, a login page, and an events page. Notice that the EventsRoute is now using a special mixin AuthenticatedRouteMixin that marks it as requiring authentication.
// Add some routes
App.Router.map(function() {
    this.route('login');
    this.resource('events', {path: 'events'},  function() {
    });
});


App.EventsRoute = Ember.Route.extend(Ember.SimpleAuth.AuthenticatedRouteMixin,{
    model: function() {
        return [ {date: "Apr 26th", title: "Science festival"},
                 {date: "Apr 27th", title: "Swim class"}
                ];
    },
});
3.2.3 SimpleAuth boiler-plate
Next up is the code that is common to any application that uses SimpleAuth, whether you're using the default password authentication or the custom Oauth authenticator we're building. All this code is taken from the examples and documentation of this library.
// Simple authentication
App.Router.reopen({
    rootURL: 'index.html'
});

App.ApplicationRoute = Ember.Route.extend(Ember.SimpleAuth.ApplicationRouteMixin);

App.LoginRoute = Ember.Route.extend({
    setupController: function(controller, model) {
        controller.set('errorMessage', null);
    },
    actions: {
        sessionAuthenticationFailed: function(error) {
            this.controller.set('errorMessage', error);
        },
    }
});

App.LoginController = Ember.Controller.extend(Ember.SimpleAuth.LoginControllerMixin, {
    authenticatorFactory: 'authenticator:custom'
  });

// The authorizer that injects the auth token into every api request
App.CustomAuthorizer = Ember.SimpleAuth.Authorizers.Base.extend({
    authorize: function(jqXHR, requestOptions) {
      if (this.get('session.isAuthenticated') && !Ember.isEmpty(this.get('session.token'))) {
        jqXHR.setRequestHeader('Authorization', 'Token: ' + this.get('session.token'));
      }
    }
  });
You can see in the LoginRoute we have a authentication failure action handler that sets the errorMessage for the login handlebars template in our index.html. The setupController is there to clear out any stale/old error messages.
Note
The final block shows the Authorizer that will inject a custom header into any back-end ajax calls with the session token (or authentication token, if you want to be that crazy :-) ). We don't need this here since we're not even dealing with a back-end server, but I thought I'd leave this code in to show you how easy it is to transfer the token to your REST API.
3.2.4 Oauth2 Authenticator
Now we come to the main portion of the example that leverages both the SimpleAuth library as well as the Oauth library. First there's a bit of configuration that needs to happen in your app that specifies the oauth server.
Ember.OAuth2.config = {
    google: {
        clientId: "XXXXXXXX.apps.googleusercontent.com",
        authBaseUri: 'https://accounts.google.com/o/oauth2/auth',
        redirectUri: 'http://127.0.0.1:5000/redirect.html',
        scope: 'https://www.googleapis.com/auth/userinfo.email https://www.googleapis.com/auth/userinfo.profile'
    }
}
App.oauth = Ember.OAuth2.create({providerId: 'google'});
You need to go to the developer google panel, and setup a new application as detailed in this post, where you will enter things like application name, authorized domain (use http://127.0.0.1:5000), and the redirect URL where Google will send you the token via a GET request.
In this case, we're going to use redirect.html file that comes straight from the docs for ember-oauth2:
<!DOCTYPE html>
<html>
  <head>
    <title>Authorize</title>
    <script>
      var hash = window.location.hash;
      window.opener.App.oauth.trigger('redirect', hash);
      window.close();
    </script>
  </head>
</html>
Finally, here's the Ember code where we actually do the authentication:
App.GoogleAuthenticator = Ember.SimpleAuth.Authenticators.Base.extend({
    restore: function(data) {
      return new Ember.RSVP.Promise(function(resolve, reject) {
        if (!Ember.isEmpty(data.token)) {
          resolve(data);
        } else {
          reject();
        }
      });
    },

    get_email: function(access_token) {
        // Call the google api with our token to get the user info
        return new Ember.RSVP.Promise(function(resolve, reject) {
            Ember.$.ajax({
                url:         'https://www.googleapis.com/oauth2/v2/userinfo?access_token='+access_token,
                type:        'GET',
                contentType: 'application/json'
            }).then(function(response) {
                resolve (response);
            }, function(xhr, status, error) {
                console.log(error);
                reject(error);
            });
        });
    },

    authenticate: function(credentials) {
        var _this = this;
        return new Ember.RSVP.Promise(function(resolve, reject) {
            // Setup handlers
            App.oauth.on('success', function(stateObj) {
                // Setup the callback to resolve this function
                token = this.getAccessToken();
                // Get all the user info
                _this.get_email(token).then(
                   function(resp) {
                       resolve({ token: token,
                                userEmail: resp.email,
                                userFn: resp.given_name,
                                userLn: resp.family_name,
                                userPic: resp.picture,
                                userGender: resp.gender,
                       });
                   },
                   function(rej) {
                       reject(rej);
                   }
               );
            });// oauth.on
            App.oauth.on('error', function(err) { reject(err.error);});
            App.oauth.authorize();
        });// return
    },

    invalidate: function() {
      var _this = this;
      return new Ember.RSVP.Promise(function(resolve) {
          // Do something with your API
          resolve();
      });
    },
});
The main entry point is authenticate which gets triggered with the action in your handlebars template. Normally, it will submit the form with identifiation (username) and password fields, which will be sent in via the credentials hash, but for our purposes we don't need any parameters.
In this function, we basically return a new promise that does the following.
- Register a handler for App.oauth.on('success') that gets called by ember-oauth2 if the Google authentication succeeds. At this point, we get the access token, and then using this token, we call the Google API to get the user information that has been authorized to us. This call to Google is done in the get_email method that returns a promise. With this information we set more variables in our session object, such as first name, last name, email, etc.
- Register a handler for App.oauth.on('error') where we reject the promise with the error text that will bubble its way into the errorMessage in the handlebars template on our login route.
And finally, we have the invalidate function that gets called when the user hits the Logout button that clears out the session information.
3.3 Summary
And there you have it: A really concise example of how to use Oauth2 authentication using implicit grant, all handled in the client-side Ember application! Hope you find this useful!
Note
Please do let me know if you find any mistakes or more efficient ways of doing things. I'm still fairly new to Ember, so I may have trodden over certain best-known-methods.